
TUZHE PACKAGING GUIDE
Radial Wedge Gift-Box Sets: Build a Position Map Before Packing
Give every wedge carton a stable tier and position code, then check the center, artwork seams, ribbon direction and removal sequence on an assembled sample.
On this page
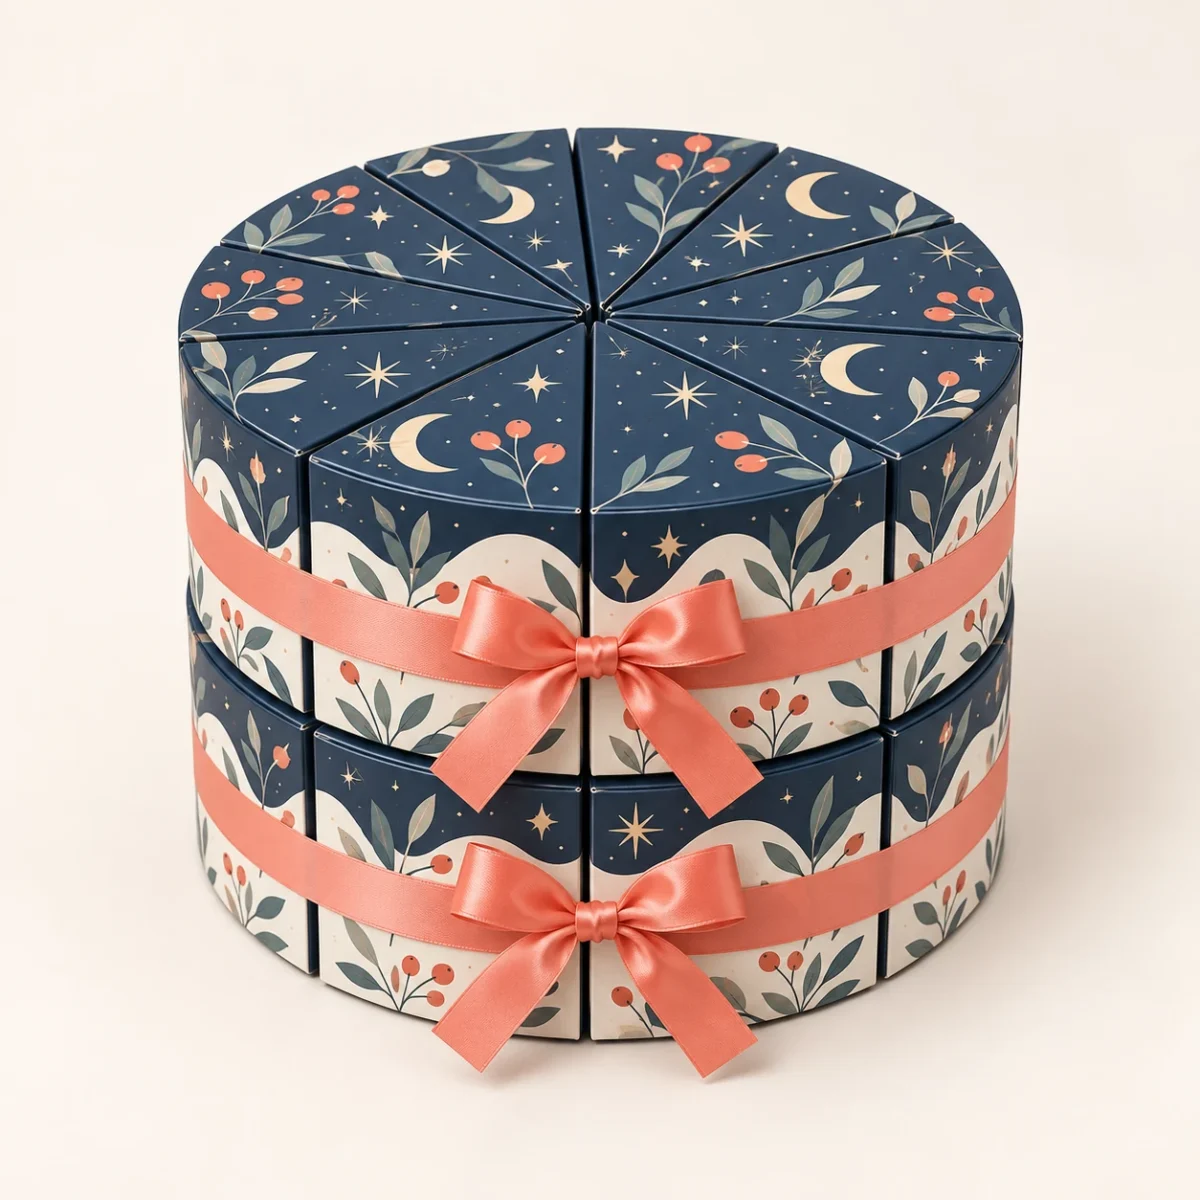
A circular gift-box set can look like one object even though it is assembled from many independent wedge cartons. That visual effect depends on position. If the wedges are rotated, swapped between tiers or packed in the wrong sequence, a continuous pattern can break and the center may no longer read as a clean circle.
A position map connects the approved artwork, printed components and packing operation. It gives every wedge a stable identity before the ribbon hides part of the arrangement.
Start with one assembled reference
Build one complete empty set using the intended number of wedges and tiers. Place it in the viewing direction that the customer should see when the package is presented. Photograph the top, the ribbon side and the center from directly above.
Mark a fixed starting point. The bow, a deliberate front graphic or a removable locator card can define the twelve-o’clock position. Without a fixed start, “wedge 1” can move every time the circle is rotated.
Give each tier and wedge a code
Use a code that remains understandable outside the artwork department. For example, T1-01 can mean tier 1, position 01; T2-01 can mean the aligned position on tier 2. Continue in one stated direction around the center.
| Record field | Example entry | Reason |
|---|---|---|
| Set reference | Approved sample or project code | Separates one revision from another. |
| Tier | T1 or T2 | Prevents visually similar wedges from moving between levels. |
| Position | 01, 02, 03… | Defines the order around the circle. |
| Start and direction | Bow side; clockwise | Makes the map repeatable. |
| Artwork file | Named approved file and revision | Links the printed component to the accepted design. |
| Packed item | Buyer’s item or assortment code | Supports a deliberate distribution sequence. |
The position code does not need to appear prominently on the consumer-facing artwork. It can be placed in an agreed concealed area, on a removable packing aid or in a controlled packing sheet. The method should be checked on the actual construction so it remains readable without becoming part of the presentation.
Check the center before the outside edge
Small angular errors become obvious where the wedge tips meet. Assemble the circle without forcing a carton past its natural position. Record a gap, overlap or raised tip against the affected position instead of hiding it with the ribbon.
Then inspect the outside edge. Confirm that the tier remains circular enough for the proposed ribbon path and that neighboring curved faces do not create an unintended step. This is a visual and assembly check; it is not a substitute for confirming the filled fit of each carton.
Review artwork across real seams
Approve the design on an assembled sample, not only on separate flat files. Follow every line, color boundary or large motif that crosses a radial seam. Photograph any mismatch with both neighboring position codes visible in the inspection record.
Graphics that do not need to continue across seams are easier to replace or reorder. If flexible distribution matters more than a single panoramic image, give each wedge a complete standalone motif while preserving a common color and hierarchy. Make that choice before final artwork is released.
Keep the ribbon out of the position logic
Each tier should be identifiable before it is tied. The ribbon can secure and present the circle, but it should not be the only way staff know which tier or starting point they have. Record bow direction separately and check that the ribbon does not cover required information.
Run a packing trial in the real sequence: place the wedges, inspect the center, align the tiers, apply each ribbon and photograph the finished front. If a wedge must be repeatedly rotated during this routine, revise the code or packing aid before production.
Test removal as well as assembly
Remove the first intended wedge, then the next. Observe what happens to the remaining cartons and the visible artwork. If the set is meant for guest distribution, the display should still make sense after several cartons have left the circle.
The radial wedge gift box set concept shows a closed two-tier arrangement and a component view with three wedges removed. Use those illustrations to define questions for a physical sample; do not treat an image as proof of filled performance.
Put the approved map in the production brief
- Attach the front-view and overhead reference photographs.
- List the start point, direction, tier codes and position codes.
- Link every position to the approved artwork revision.
- Record the packed item or assortment assigned to each wedge.
- State ribbon position and the inspection view required after tying.
- Keep a signed or otherwise controlled sample record with the map.
The broader custom packaging approval checklist helps keep structure, artwork and sample decisions in the same record. ISO 2206 describes a system for identifying package parts during testing, while ISO 4178 identifies information to record in distribution trials. These standards do not define this radial packing map, but they support the general discipline of stable part identification and documented observations.